How to Enable Web Filter on Devices?
The world is only a click away with internet, but this is not always good for children since they are not mature enough to tell right from wrong. So measures should be taken to prevent children from browsing inappropriate contents. In this article, you are going to understand how to enable web filter on main devices including Windows, Mac, Google Chrome, iPhone and Android. Now let’s get started!
 Part 1: Windows
Microsoft does a great job in parental control for it allows admin to set a separate account to limit internet access for kids. If you would like to enable web filter on Windows, you can simply follow the steps below.
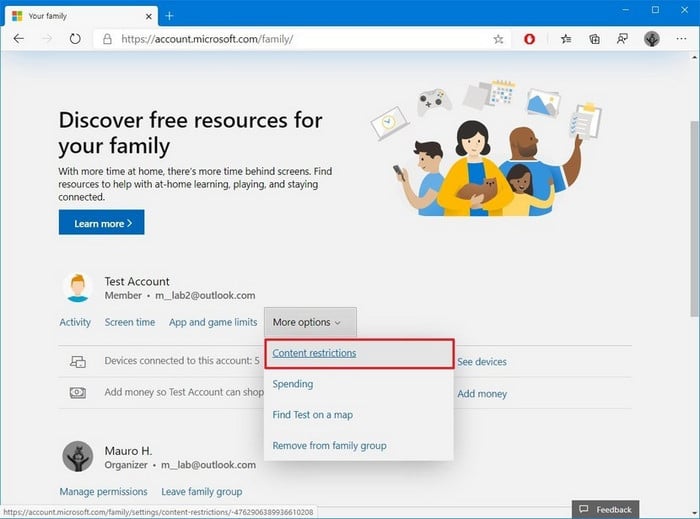
Step 1: Sign into your Microsoft account on this page
Step 2: Find your child’s name and click Content restrictions.
Step 3: Scroll to Web browsing and toggle Block inappropriate websites from off to On.
Step 4: For blocking specific sites, add their URLs under Always blocked.
Step 5: To limit your child to only browse specific websites, check the box next to Only allow these websites.
Part 2: Mac
The settings below only apply to Safari and if you want to block websites in Chrome, Firefox, or other browsers, you'll need to download specific add-ons for those browsers.
Step 1: From the Apple menu, select System Preferences.
Step 2: Select Parental Controls.
Step 3: Choose the user account on the left side of the window that you want to enable filtering for (your child’s account).
Step 4: Select Enable Parental Controls.
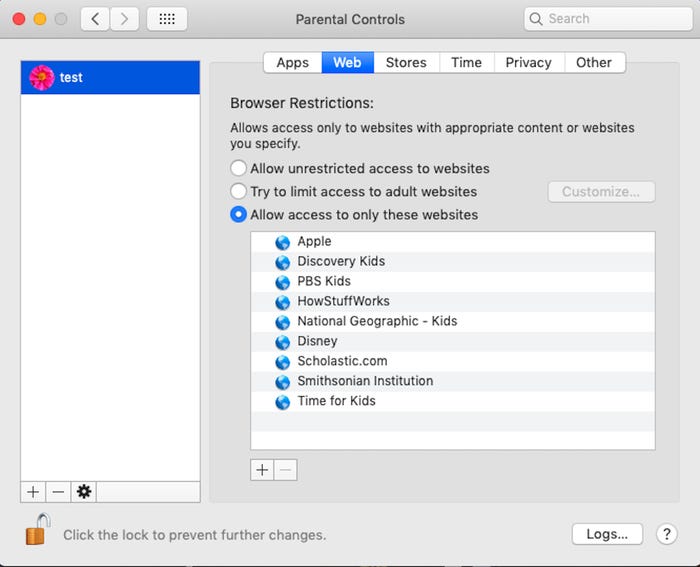
Step 5: Click the Content tab.
Step 6: Choose one of the three modes under Website Restrictions (unrestricted, automatic, whitelist).
Part 3: Google Chrome
There exist many extensions which allow you to block websites in Chrome. Here we take BlockSite as an example to demonstrate for you.
Step 1: Visit the Block site extension page on the Chrome web store.
Step 2: Click the Add to Chrome button at the top-right of the page.
Step 3: Click the Add extension button on the pop-up window to confirm install of the extension. Once the extension is installed, a thank you page opens as a confirmation.
Step 4: Click Agree on the BlockSite page to allow BlockSite to detect and block adult content web pages.
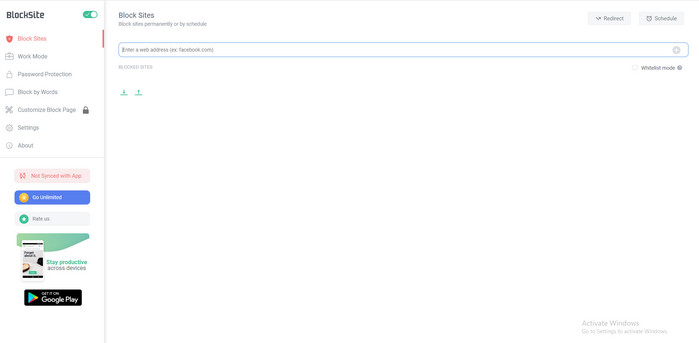
Step 5: The BlockSite add-on icon is displayed at the top-right of the Chrome window.
Step 6: On the Block Sites configuration page, enter the web address for the website you want to block in the Enter a web address text field. Click the green plus symbol at the far-right of the web address text field to add the website to the block list.
Part 4: iPhone
iOS device enables parents to limit access to adult contents in Safari and apps on device for children. Besides, you can also limit access to only approved websites.
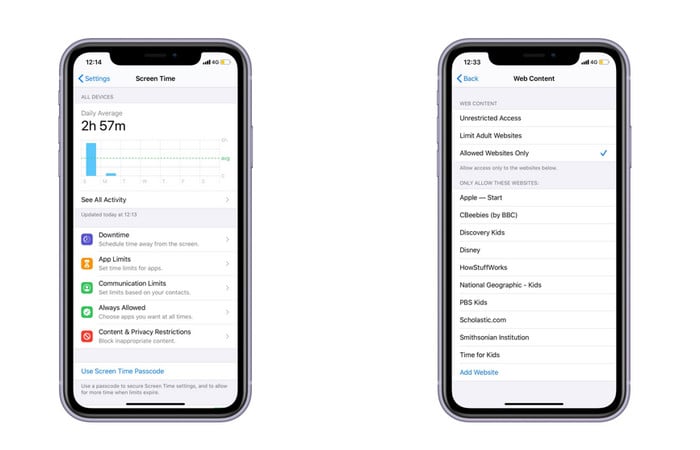
Step 1: Go to Settings > Screen Time.
Step 2: Tap Content & Privacy Restrictions and enter your Screen Time passcode.
Step 3: Tap Content Restrictions, then tap Web Content.
Step 4: Choose Limit Adult Websites, or Allowed Websites Only.
Part 5: Android
Since Android differs in web filter, here we offer a parental control solution for all Android devices which is PanSpy. With this app installed on target device, you are able to view its links of browsing websites, records of browsing data and time as well as all available information for browsing histories. PanSpy also functions as keylogger to let parents know what their children type. Moreover, you can even set alert words so that you can be informed immediately when they display on your child’s screen to prevent them from being exposed to inappropriate contents.
Features of PanSpy
How PanSpy works
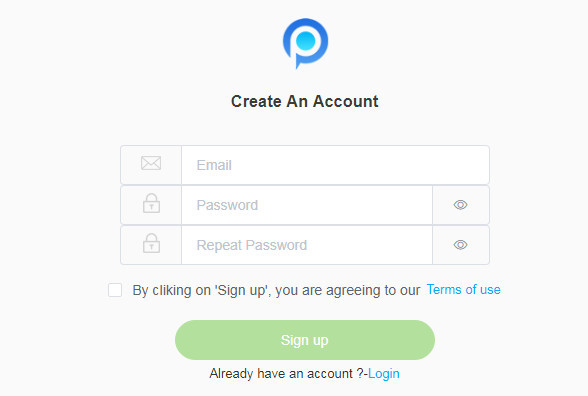
Step 1: Create a PanSpy Account
To activate its usage, you need to visit PanSpy Official Website to create an account. Just tap on Sign UP button on the top right, enter your authentic email address and make a password of it. After a while, you’ll receive a confirmation link in your email box. Once you activate it, you can follow the setup wizard to finish setup procedures.
Step 2: Install PanSpy App on Android
Go to your child's Android and enter panspy.me on browser to install PanSpy app on it. Then login your account which you previously registered with to authorize PanSpy to access data on monitored device according to instructions given on screen. Finally you are able to decide to keep the app icon or not.
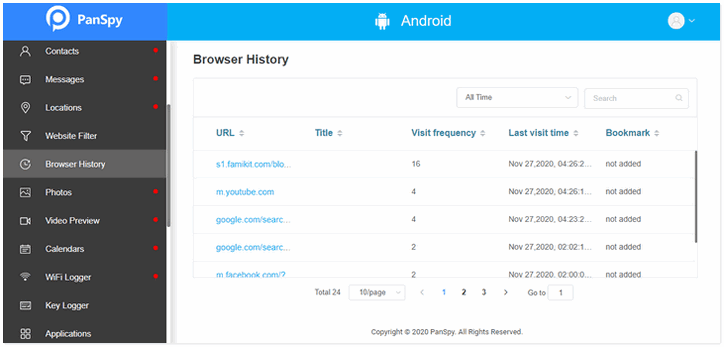
Step 3: Start Parental Control on Android
Now you can turn back to PanSpy console panel to start monitoring and parental control. All supported features including calls, messages, emails, apps, photos, browser histories, Viber, Snapchat, WhatsApp, Line, Facebook and more are listed on the panel so that you can click each of them to remotely access to the target device. You can simply tap on Browser History on the left to view links of browsing websites, records of browsing data and time and all available information for browsing histories. Go to Keyword Alerts to set sensitive words and you will get notification once they show up on kid's screen. Key Logger will inform you what kids type on their phone. For more parental control features of PanSpy, you can click on each of tab on the left panel.
 Summary
Above we mentioned how to enable web filter on Windows, Mac, Google Chrome and iPhone. More importantly, a powerful parental control solution PanSpy is come up with to deal with Android devices. With this app, parents can fully access to kid’s Android and set limitations on it. Have more ideas about parental control? Just visit PanSpy to explore!
All Topics
- Mobile Monitor
-
- Track Contacts, Call Logs
- Track Calendar, Apps
- Track SMS Messages
- Track GPS Location
- Track Browsing History
- Track Instagram
- Track Hangouts
- Track WhatsApp
- Track Facebook
- Track Twitter
- Track Tinder, Skype
- Track Snapchat
- Track Kik Messages
- Track Wechat History
- Track QQ Chat History
- Track Wi-Fi Networks
- Parental Control
-
- 2021 Best Parental Control Apps for Android
- Monitor Child's Device
- Cell Phone Addiction
- Stop Facebook Addiction
- Block Porn on Phone
- Track Child's Location
- Employee Monitor
-
- Monitor Employee Emails
- Monitor Browser History
- Employee GPS Tracker